With the suspension almost complete, it's time to rebuild the calipers. Having already cleaned, de-rusted, and painted the calipers, it should be an easy task of installing new seals and giving the completed calipers a coat of shiny paint.
Front Caliper Rebuild
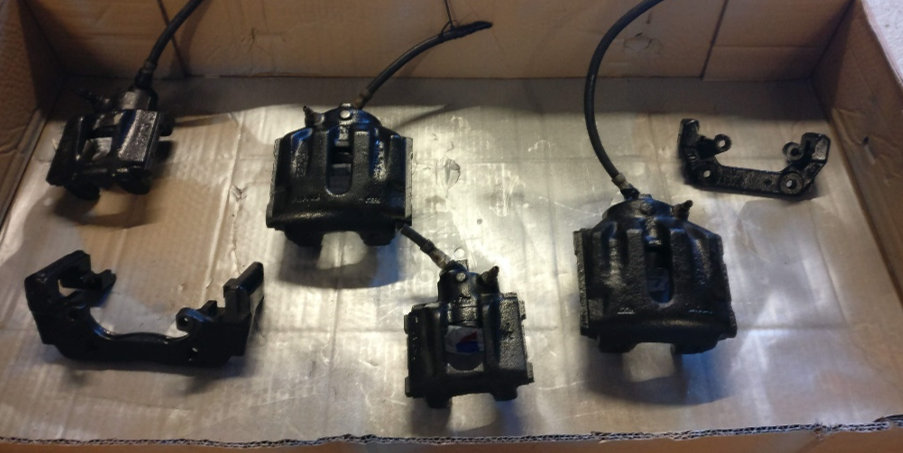
This ‘quick’ job starts with laying out all the tools (which I think are) need alongside the cleaned calipers. This includes the following
Plastic glue stick (a soft tool for prying inside the piston hosing)
9 mm socket on ¾ inch wrench
Jamjar with dot 4 oil inside
Bike pump and old brake hose with an epoxied in football needle (made previously )
Wooden plank
Hammer (not really required… but a good practice to always have one handy)
Parts layout on my workbench.
I began by ensuring the caliper was still clean. Whilst I had given these parts a deep clean before, I felt another quick clean to remove any last particulates couldn’t hurt. For this, I removed the bleed nipple using the 9 mm socket and then sprayed plenty of brake cleaner through both this hole and the main brake line port. With the piston cavity wiped out and dry, the rebuilding can begin, starting with the seals.
Front Caliper and piston ready for mating.
In the front caliper rebuild kit (part no. JLM12123) there are two seals which need to be re-installed (sketch of locations shown below). The first is a square edge O-ring, which acts as the primary oil seal between the pressurized brake system and the outside world, whilst allowing the piston to slide freely. The second is the dust seal, which prevents dirt and grime from getting onto the smooth piston surface which could damage the square edge seal.
Sketch of internal brake components.
The XJ40 build service manual suggests coating the square edge seal with plenty of dot 4 oil prior to installation. My low tech solution here was to drop the square edge seal into a small jar of dot 4 oil and leave for a for moments until it was required.
Square edge O ring in a jam jar of dot 4 oil.
This is then placed into the recessed region in the caliper. At first, the seal appears oversized for the recesses but with a plastic spatula, the seal easily slots into place. According to the manual, the key is to ensure the seal is not twisted and if it is, simply take it out and refit. I didn’t have 100% success each time, but it was easy to remove and repeat.
Squared edged O-ring inside the caliper.
Now, this seal is in place the attention turns to the piston and the dust seal. This is a little trickier as one end of the dust seal fits into the outer recess on the caliper and the other fits into the lip on the piston. Following the procedure outlined in the Haynes manual, I didn’t find this too difficult (at least not compared to other jobs I’ve done so far).
This suggested procedure is as follows:
Using a finger apply a liberal coat of dot 4 oil onto the piston and inside the caliper.
Pass the dust seal over the piston in the correct orientation.
Ensure the end of the seal which fits into the piston is over the piston seal end. This was not a simple step, as due to the oiled surfaces, this seal easily slides off the piston!
Then place the base of the piston into the caliper. Ensure the bottom part of the seal sits in the correct recess within the caliper.
Using the plastic spatula slowly push in the remainder of the seal into the groove on the caliper. With gentle pushing and sliding the spatula around the edge, this easily slots into place.
The piston can then be pushed back into the caliper housing. Once the piston is all the way in, the top of the dust seal should automatically fit into the recess in the piston.
And with that, the first caliper is rebuilt. A stop motion video of this process is shown below.
To check the piston moved freely within the caliper, I connected each finished calipers to my bike pump using the modified brake line. To avoid the piston jumping out of the caliper due to the air pressure, I placed a thick piece of wood between the piston and the opposing edge of the caliper. Having rebuilt both front calipers, the pistons moved easily within the caliper.
Rear Caliper Cockups
Having rebuilt the front calipers, I was ready to rinse and repeat the process on the rears. This was, however until I immediately realized that I had purchased the wrong replacement seals. No measuring was required a quick side by side comparison was all it took. Luckily I phone up SNG Barratt, explained my problem and they suggested that the correct part was JLM2200 and not JLM795. I posted back the wrong parts and they gave me a full refund, excellent service despite my cock up.
Smaller original parts next to the wrongly ordered larger new items!
The new seals arrived with the rear brake discs and shoes and hence why this blog post is appearing in this order. With the correct parts purchased the rebuild process was the same as that for the front.
Correct rear caliper seal parts layout.
Dust seal on piston.
Dust seal and piston partially installed into the caliper.
Dust seal fully seated in the slot.
Finally assembled rear caliper.
Caliper Painting
Now the calipers are all rebuilt it's time to give them a shiny top coat of paint. I had been putting this off until they were rebuilt, as I didn’t want to run the risk of getting any spray paint into the piston housing. All the parts were given a quick scrub down with some sandpaper to give the surface a good key and then placed in a large box ready for painting,
Blurry photo of brake parts waiting for sliver top coat.
In addition to the calipers, I also wanted to paint the caliper brackets as well to match. I brought a silver brake caliper paint off Amazon, which turned out to be a polish brand oddly enough. Despite this I was easily able to translate the instructions, that being shake well before spraying. To check the paint's colour and test for any reaction with the POR15, I initially just painted a caliper bracket.
Chosen caliper paint, and a before and after comparison of a caliper bracket.
I was happy with the result, so I decided to paint the rest of the calipers and brackets. Before painting the calipers I covered the piston and seals in masking tape. To stop paint getting into the caliper I refitted the old brake lines and bleed nipples. Several light coats later and the parts began to look very shiny!
Freshly painted brake parts
Painted caliper and bracket.
The underside of the painted caliper.
Installing Rubber Sliders
The final stage of rebuilding the calipers is to install the rubber collars which the caliper pins slide in. The original collars from the donor car were in good condition and after a quick wash and brush up they came out like new.
Caliper pin, rubber collars.
The recessed section fits into the caliper, either side of the piston. They are a tight fit and are held in place by the lip at the bottom of the collars. To aid installing these, a quick coat of Silicon grease was put on the recessed part.
Silicon grease applied to rubber collar.
With a little gentle teasing and pushing all these collars quickly fitted back into place. Since these are not going back on the car yet I have not got the slide pins out. That as they say is the plan for a different day.
Fully painted and re-assembled rear brake caliper.